
TL;DR
Certificate auth with PnP.Framework has three moving parts: an app registration withSites.FullControl.All and admin consent actually granted, a certificate where you upload the
.cer and keep the .pfx, and then new PnP.Framework.AuthenticationManager(clientId, certificate, tenantId). Call GetContext(siteUrl) on that and you’re holding a plain CSOM ClientContext -
everything you already know about CSOM works from there. If you get a 401, check the admin consent
before you start suspecting the certificate.What does PnP.Framework actually do for authentication?
It gets you a ClientContext without a human clicking a login prompt. That’s the whole job. You hand
PnP.Framework.AuthenticationManager a client ID, a certificate and a tenant ID, and it deals with the
OAuth flow so you don’t have to. Everything after that is ordinary CSOM.
Which is exactly what you want for a background service or a console app - anything that has to reach SharePoint at three in the morning with nobody around to sign in. Here’s the setup end to end.
If you arrived here because an app-only client secret suddenly stopped working: that’s Azure ACS. It was retired for SharePoint Online on 2 April 2026, with no extension, and certificate-based authentication against a Microsoft Entra app registration is the replacement. That’s what this post sets up - so this is the destination, not a detour.
App registration
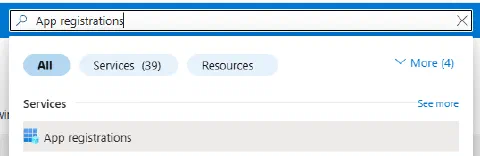
Go to https://portal.azure.com and search for “App registrations”:
Click “New registration” and fill out the name, and leave the “Supported account types” to default for now (Default: Accounts in this organizational directory only (xxx - Single tenant))
And now just press “Register”
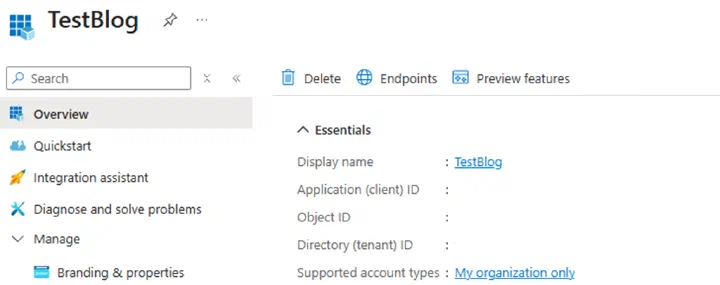
Just like so, you have created your app registration! Take note of the Application (client) ID and Directory (tenant) ID from the overview page - you’ll need these values later in your C# code.
Generate certificate
We need a certificate on the app registration, and in our code to authenticate our C# application. Certificates are more secure than client secrets because they’re harder to extract and can be managed through your organization’s PKI infrastructure.
Open PowerShell as Administrator and run the following commands:
$cert = New-SelfSignedCertificate `
    -Subject "CN=MyPnPAppCert" `
    -CertStoreLocation "cert:\CurrentUser\My" `
    -KeyExportPolicy Exportable `
    -KeySpec Signature `
    -KeyLength 2048 `
    -NotAfter (Get-Date).AddYears(3)

$plainText = "MySuperStrongPassword!"
$secureString = ConvertTo-SecureString $plainText -AsPlainText -Force

Export-PfxCertificate `
    -Cert $cert `
    -FilePath "C:\Temp\cert\pnpappcert.pfx" `
    -Password $secureString

Export-Certificate `
    -Cert $cert `
    -FilePath "C:\Temp\cert\pnpappcert.cer"
This script creates a self-signed certificate that’s valid for 3 years. The certificate gets stored in your personal certificate store, and we export both the .pfx file (containing the private key) and the .cer file (public key only). Make sure the C:\Temp\cert\ directory exists before running this script.
Upload certificate
We need to upload the generated certificate - the .cer file (NOT the .pfx), to the app registration. The .cer file contains only the public key, while the .pfx contains the private key that should never be shared.
Navigate to your app registration in Azure Portal, go to “Certificates & secrets”, then click “Upload certificate”:
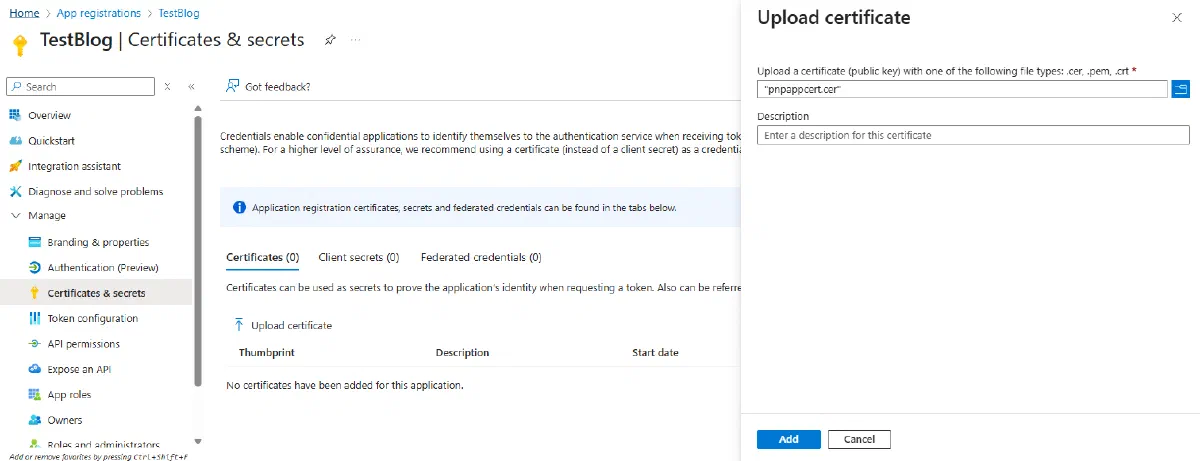
After uploading, you’ll see the certificate listed with its thumbprint. The thumbprint can be useful for identifying which certificate to use if you have multiple certificates.
Add permissions
Our app registration needs permission to be able to do stuff. There are two types of permissions: Delegated and Application. The differences between them are:
- Delegated permissions: Your app acts on behalf of a signed-in user. The app can only access what the user has access to.
- Application permissions: Your app runs as itself without a signed-in user. The app has access based on what you grant it.
For this example we’ll use the SharePoint permission “Sites.FullControl.All” as an application permission, which gives our app full access to all SharePoint sites.
After adding the permission, don’t forget to click “Grant admin consent” - this is crucial! Without admin consent, your app won’t be able to use the permissions even if they’re assigned.
Now our app registration is setup and ready to be used in our C# code.
C# Implementation
Now let’s write the C# code to authenticate and connect to SharePoint using our certificate. I’ll show you a complete working example that you can use as a starting point for your own projects.
First, create a new Console Application in Visual Studio and install the PnP.Framework NuGet package:
You can install it via Package Manager Console: Install-Package PnP.Framework
Here’s a complete example that connects to SharePoint and demonstrates several common operations:
using PnP.Framework;
using System.Security.Cryptography.X509Certificates;

class Program
{
    private static readonly string TenantId = "your-tenant-id";
    private static readonly string ClientId = "your-client-id";
    private static readonly string CertificatePath = @"C:\Temp\cert\pnpappcert.pfx";
    private static readonly string CertificatePassword = "MySuperStrongPassword!";
    private static readonly string SiteUrl = "https://yourtenant.sharepoint.com/sites/yoursite";

    static async Task Main(string[] args)
    {
        try
        {
            // Load the certificate
            var certificate = new X509Certificate2(CertificatePath, CertificatePassword);

            // Create authentication manager
            var authManager = new AuthenticationManager(ClientId, certificate, TenantId);

            // Get context
            using var context = authManager.GetContext(SiteUrl);

            // Load web properties
            context.Load(context.Web, w => w.Title, w => w.Url);
            await context.ExecuteQueryAsync();

            Console.WriteLine($"Connected to: {context.Web.Title}");
            Console.WriteLine($"Site URL: {context.Web.Url}");

            // Example: Get all lists
            context.Load(context.Web.Lists, lists => lists.Include(l => l.Title, l => l.ItemCount));
            await context.ExecuteQueryAsync();

            Console.WriteLine("\nLists in this site:");
            foreach (var list in context.Web.Lists)
            {
                Console.WriteLine($"- {list.Title} ({list.ItemCount} items)");
            }

            // Example: Create a new list
            await CreateSampleList(context);

            // Example: Upload a document
            await UploadDocument(context);
        }
        catch (Exception ex)
        {
            Console.WriteLine($"Error: {ex.Message}");
        }
    }

    private static async Task CreateSampleList(ClientContext context)
    {
        try
        {
            var listCreationInfo = new ListCreationInformation
            {
                Title = "Sample List",
                TemplateType = (int)ListTemplateType.GenericList
            };

            var list = context.Web.Lists.Add(listCreationInfo);
            context.Load(list);
            await context.ExecuteQueryAsync();

            Console.WriteLine($"\nCreated list: {list.Title}");
        }
        catch (Exception ex)
        {
            Console.WriteLine($"List creation error: {ex.Message}");
        }
    }

    private static async Task UploadDocument(ClientContext context)
    {
        try
        {
            var docLib = context.Web.Lists.GetByTitle("Documents");
            var fileCreationInfo = new FileCreationInformation
            {
                Content = System.Text.Encoding.UTF8.GetBytes("Hello from PnP Framework!"),
                Url = "sample-document.txt",
                Overwrite = true
            };

            var uploadFile = docLib.RootFolder.Files.Add(fileCreationInfo);
            context.Load(uploadFile);
            await context.ExecuteQueryAsync();

            Console.WriteLine($"\nUploaded file: {uploadFile.Name}");
        }
        catch (Exception ex)
        {
            Console.WriteLine($"File upload error: {ex.Message}");
        }
    }
}
Understanding the Code
Let’s break down what this code does:
- Certificate Loading: We load the .pfx file with the password we set earlier
- Authentication Manager:
PnP.Framework.AuthenticationManagerhandles the OAuth flow using the certificate. The overload used here takes(clientId, certificate, tenantId); there are others for secrets, interactive login and loading the certificate from the store by thumbprint - Context Creation:
GetContext(siteUrl)gets aClientContextobject that represents our connection to SharePoint - Basic Operations: Shows how to read site properties, list all lists, create a new list, and upload a document
The beauty of PnP.Framework is that it abstracts away all the complex authentication details. Once you have the ClientContext, you can use it just like the regular SharePoint CSOM (Client Side Object Model).
Important Notes
- Replace
your-tenant-id,your-client-id, and the site URL with your actual values from Azure Portal - The certificate path should point to your .pfx file (not the .cer file)
- Make sure your app has the necessary permissions granted and admin consent given
- Store sensitive information like certificates and passwords securely in production (use Azure Key Vault or similar)
- Consider using certificate thumbprints instead of file paths in production environments
- The
usingstatement ensures proper disposal of the ClientContext
Production Considerations
For production applications, consider these improvements:
// Load certificate from certificate store instead of file
var store = new X509Store(StoreName.My, StoreLocation.CurrentUser);
store.Open(OpenFlags.ReadOnly);
var certificate = store.Certificates.Find(X509FindType.FindByThumbprint, "your-cert-thumbprint", false)[0];
store.Close();

// Use configuration instead of hardcoded values
var tenantId = Configuration["Azure:TenantId"];
var clientId = Configuration["Azure:ClientId"];
Troubleshooting
Certificate auth fails in a small number of ways, and the error messages are unhelpfully similar. Here’s the triage order, cheapest check first.
The remote server returned an error: (401) Unauthorized. (also seen as Connect-PnPOnline : The remote server returned an error: (401) Unauthorized.)
Work down this list in order - the first two account for most of them:
- Admin consent was never granted. The permission is listed on the app registration but nobody approved it. Azure Portal shows this clearly: the permission needs to read “Granted for [Your Organization]”, not just be present.
- The tenant has custom app authentication disabled. This one is nasty because nothing about the error hints at tenant configuration - your app registration is perfect and it still 401s. The switch is
Set-SPOTenant -DisableCustomAppAuthentication $trueto block it,$falseto allow it again. - Wrong token audience. A Microsoft Graph token does not work against SharePoint’s
/_api, and vice versa. SharePoint wantshttps://<tenant>.sharepoint.com/.default. - The certificate isn’t actually associated with the app registration. Check you uploaded the
.cerand that the thumbprint in the portal matches the certificate your code is loading.
Attempted to perform an unauthorized operation. and Access denied. You do not have permission to perform this action or access this resource.
You authenticated fine - the token is good, the operation is not allowed. Usually the permission is narrower than the thing you’re doing (Sites.Read.All when you need write), or the site is locked down beyond what tenant-level consent covers.
Access is denied. (Exception from HRESULT: 0x80070005 (E_ACCESSDENIED))
Same family, thrown from deeper in CSOM. Common on site-scoped operations and on template application, where one handler in the template needs a permission the rest of the run didn’t.
Microsoft.SharePoint.Client.ServerException: No User or App Context found
The ClientContext was created without a working authentication path. Check that GetContext actually returned before you used it, and that the certificate loaded.
The sign-in name or password does not match one in the Microsoft account system.
This one lies. It usually has nothing to do with the password. It’s what you get from SharePointOnlineCredentials when MFA is enabled, when Conditional Access blocks legacy authentication, or when you’re on .NET Standard where that class doesn’t exist at all. The fix isn’t a better password, it’s the app-only certificate setup on this page.
Cryptography Next Generation (CNG) is not supported on this platform.
The .pfx was generated by New-SelfSignedCertificate on Windows and is now being loaded somewhere that isn’t - a Linux build agent, or a container. Regenerate it with OpenSSL for that platform.
Certificate not found: Make sure the certificate path is correct and the password matches what you used when creating it. You can verify the certificate exists by checking it in the Windows Certificate Manager (certmgr.msc).
Tenant ID issues: You can find your tenant ID in the Azure Portal under Azure Active Directory > Properties. It’s also visible in the app registration overview page.
Certificate validation errors: If you’re using a self-signed certificate in a corporate environment, your organization’s security policies might block it. Consider using a certificate issued by your internal CA.
Testing Your Setup
Before diving into complex operations, test your connection with this minimal code:
try
{
    var certificate = new X509Certificate2(CertificatePath, CertificatePassword);
    var authManager = new AuthenticationManager(ClientId, certificate, TenantId);
    using var context = authManager.GetContext(SiteUrl);

    context.Load(context.Web, w => w.Title);
    await context.ExecuteQueryAsync();

    Console.WriteLine($"Success! Connected to: {context.Web.Title}");
}
catch (Exception ex)
{
    Console.WriteLine($"Connection failed: {ex.Message}");
}
Wrapping Up
You now have a working setup for authenticating with SharePoint using PnP.Framework and certificates. This method is perfect for background services, console applications, or any scenario where you need unattended access to SharePoint.
The certificate-based authentication is more secure than using client secrets since certificates are harder to compromise and can be managed through your organization’s certificate infrastructure.
In my next post, I’ll show you how to perform common SharePoint operations like creating lists, uploading files, and managing permissions using this authentication setup.
References